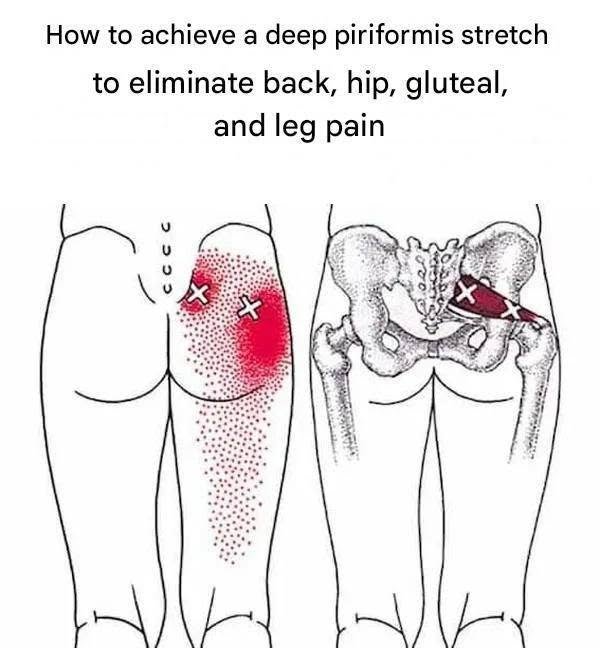
Unlike the sensationalized viral hooks and clickbait we’ve been exploring, piriformis syndrome is a very real and painful orthopedic condition, and targeted stretching is one of the cornerstone treatments for managing it.
What is Piriformis Syndrome?
The piriformis is a small, deep muscle located in the buttocks, sitting right behind the gluteus maximus. It helps stabilize the hip joint and rotates the leg outward.
Piriformis syndrome occurs when this muscle becomes tight, inflamed, or spasms, and subsequently irritates or compresses the nearby sciatic nerve, which runs right underneath (and sometimes right through) the muscle. This causes pain, tingling, or numbness that radiates deep into the buttock and can travel down the back of the leg—often mimicking true sciatica caused by a disc issue in the lower back.
3 Effective Piriformis Stretches
Because the piriformis muscle runs deep in the hip, stretching it requires specific rotational movements to lengthen it. Here are three common, effective stretches recommended by physical therapists:
1. The Figure-4 Stretch (Supine / Lying Down)
-
How to do it:
-
Lie flat on your back with both knees bent and your feet flat on the floor.
-
Cross your right ankle over your left knee, creating a “figure-4” shape.
-
Reach your hands behind your left thigh (or over your left shin) and gently pull your left knee toward your chest until you feel a deep, comfortable stretch in your right buttock.
-
Hold for 20 to 30 seconds, breathing deeply, then switch sides.
-
-
Why it helps: This position safely isolates the piriformis muscle without putting excess pressure on your spine.
2. The Seated Figure-4 Stretch
-
How to do it:
-
Sit upright on the edge of a sturdy chair with both feet flat on the floor.
-
Cross your right ankle over your left knee.
-
Keeping your back straight and your chest proud, gently hinge forward at your hips until you feel a stretch deep in your right glute. Avoid slouching or rounding your lower back.
-
Hold for 30 seconds, then switch sides.
-
-
Why it helps: This is a convenient option if you work at a desk or want a stretch you can do easily throughout the day.
3. The Pigeon Pose (Advanced)
-
How to do it:
-
Start on your hands and knees on a comfortable mat.
-
Slide your right knee forward and angle it out toward your right wrist, tucking your right foot inward toward your left hip.
-
Extend your left leg straight back behind you, keeping your hips squared toward the floor.
-
Lower your upper body down toward the floor (resting on your forearms or forehead) as far as is comfortable.
-
Hold for 30 seconds to a minute, then slowly switch sides.
-
-
Why it helps: This is a powerful, deep hip opener. Note: If you have knee or lower back issues, this stretch can sometimes be too intense; if it causes sharp pain, stick to the lying or seated figure-4 variations instead.
Important Tips for Safe Stretching
-
Never Stretch Through Sharp Pain: A deep, pulling sensation is normal and expected; sharp, shooting, or electric pain means you should back off immediately.
-
Address the Root Cause: Stretches provide wonderful temporary relief by loosening tight tissue, but if your piriformis syndrome is triggered by prolonged sitting, weak core/glute muscles, or poor running mechanics, combining stretches with strengthening exercises (like clamshells or glute bridges) and movement breaks is key.
Are you dealing with deep hip or sciatic discomfort right now, or were you looking up stretches to help manage a recent flare-up?